
Sunday, March 25, 2012
Sock Puppet
Sock puppets! This is always fun when you have socks that are too small and clean of course!


Jungle Time
The kids worked on making ABAB pattern snakes using paper plates.

We made a HUGE snake! I took large paper, 4 very large pieces, and layed them 2 x 2. I them drew a large snake onto the papers. I took the large pieces of paper and cute them each in half, so there were now 8 pieces. I outlined the snake with a black marker.
I put out oil pastels and let the kids that wanted to decorate a piece of the snake. When all the pieces were colored, we put them back together and our colorful snake puzzle was created!

Then we painted a large piece of butcher paper using yellow and brown paint with sand and glitter added to it. The kids had fun cover the entire paper with color!


Our window vines and coffee filter butterflies!


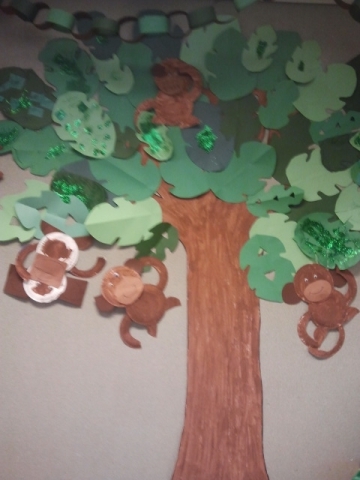
Our jungle tree turned out super neat! The kids but out leaves and decorated them using different green art supplies! Then we made paper plate monkeys using brown circles for the ears and light brown ovals for the mouth. The kids cut out their own pieces.


Friday, March 23, 2012
Kelso's Circle
This was my version of Kelso's Circle for problem solving. We took pictures of the kids demonstrating each of the scenarios, most of them were candid photos. The puzzle was actual tricky to make! I laminated the pictures, and backed them with super bright colored paper, which was also laminated, but separately. Them I decided to attach the pictures to the bright colored paper using magnet tape. I thought it could be a game for the kids to match up the picture to the word, with teacher help of course!
The puzzle was hanging in our peace center last year. This year all we needed to do was to retake and re-laminate the pictures. Now it is sitting on our peace/yoga/super solvers table.

Starry Night
This was a super easy art activity. I used a di-cut and made blue circles for the moon and yellow stars. The kids talked about the shapes and what happens at night time. They glued the shapes to a black piece of paper and numbered the stars. Some of the kids needed to trace the numbers, but most were able to write the numbers on the stars themselves!


Thursday, March 22, 2012
Planting a seed
We planted peas in clear cups to watch them grow! We told the kids during our circle time the steps to planting a seed. Most of the children in our class remembered each step with no reminders! We also had them put their names onto the cups using stickers with handwritten letters on them, kind of like a name puzzle!
After we planted out seeds, we put them in the window so they got sunshine, and watered the plants.
We put one plant under a box to see if a plant would grow without sunshine! The class made a T-chart and guessed if the thought if it would grow or not grow, they said it would grow! Then we made another chart and I wrote down what they thought would happen to the plant that got sunshine and the plant that did not get sunshine, (both plants got water!). I wrote down exactly what each child said! It turned out pretty funny and cute!
We also made a poster about the steps to planting a seed and watching it grow. I drew the pictures that they explained to me, and wrote down what they said for each step. The last step a little boy came up with was "Pick the red ones and give them to my mom." SUPER CUTE!
We planted a few more things in our windowsill garden and watched them grow!


I wanted to make an observation board outside the classroom in the hall. I drew leaves onto white paper and had the kids working on their cutting skills. Then we mixed green paint and yellow paint to make different shades of green. I put salt into the paint to add a lot of texture! It turned out really neat! I then took the leaves and backed them with construction paper. We painted large pieces of white paper using paint, glitter, shapes and buttons. I only put 2 pieces of paper on the table, so the kids had to work together to make their masterpiece. I cut the paper in the shape of a flower and backed it again.


After we planted out seeds, we put them in the window so they got sunshine, and watered the plants.
We put one plant under a box to see if a plant would grow without sunshine! The class made a T-chart and guessed if the thought if it would grow or not grow, they said it would grow! Then we made another chart and I wrote down what they thought would happen to the plant that got sunshine and the plant that did not get sunshine, (both plants got water!). I wrote down exactly what each child said! It turned out pretty funny and cute!
We also made a poster about the steps to planting a seed and watching it grow. I drew the pictures that they explained to me, and wrote down what they said for each step. The last step a little boy came up with was "Pick the red ones and give them to my mom." SUPER CUTE!
We planted a few more things in our windowsill garden and watched them grow!


Farm Life
We created a large barn using a lot of different art supplies that were all red. The kids choice what color to paint the bar. We used buttons, glitter, stamps, construction paper cut into different shapes, yarn, markers, crayons, and paint.
I put a large piece of butcher paper down on the table and let them go! They made a lot of little pictures, some kids just painted a solid piece, some made shapes or even people. After it dried I outlined it with black paint and cut it to size. The kids loved the barn!


I put a large piece of butcher paper down on the table and let them go! They made a lot of little pictures, some kids just painted a solid piece, some made shapes or even people. After it dried I outlined it with black paint and cut it to size. The kids loved the barn!


We made paper plate chickens that turned out really cute! And the kids loved making it. This was a step by step art activity, we also talked about chickens and how they live and shapes! We did not have feathers but if we did we would have added yellow feathers!

Milking Bessie the Cow, again!

We milked a cow again! This time when I made the giant cow I laminated it so we can reuse it next year when we do our farm unit. I put white paint and glue into a rubber glove and poked a small hole in the finger tip of the glove with a tack. I tied a string to the glove and held the string from above the kids even put our red cowboy boots and cowboy hat on! I put a large piece of paper underneath their black paper because it got messy! Then I used the large paper for the bulletin board I turned into a documentation board! The kids love doing this!


Ice Cube paintings
This was so much fun! There were even parents that come in after we did the activity and were very excited about their child's artwork that came home! We froze tempra paint in ice cube trays. Before they froze we put sticks in the paint for a handle to paint with. After they were frozen we took them out and let the kids go wild! We had them try to write a few letters, but they were more interested in watching the ice paint melt. Most of the kids made large circles on their paper, that was interesting!
It works best if you allow the ice paints to thaw for about 5 minutes before you start! This was one of my favorites! I even sat with the kids and made a beautiful picture!


It works best if you allow the ice paints to thaw for about 5 minutes before you start! This was one of my favorites! I even sat with the kids and made a beautiful picture!


Finger painting for place mats.
Our class needed something fancy to set the table with for our snack. So I put down a large piece of butcher paper and got some finger paints out and let the kids have fun! Then I took it home, cut the large paper down and backed over 20 pieces with construction paper then had it laminated. I would suggest double laminating the place mats! Ours did not stick together well, and when the kids spilled it got the paper inside wet. I chose to do one large piece of butcher paper instead of individual pieces of paper so it would not take very long to set the snack table up with who sits with what place mat. So this was a group project and everyone was involved in the outcome. We do not use them any more, but they sure were pretty and fun to make!


Different Tree Ideas
So I looked online to inspire my winter tree. I really like these trees.


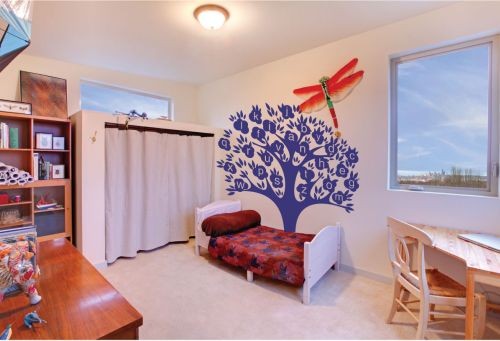
This is what I decided to create. The owls are a character from the curricullum "Ollie."

Subscribe to:
Comments (Atom)